
Recently added
More...


Categories
Suppliers
Newsletter
Once, twice in month we will send You info about new products, products on sale and news from Arduino and DIY world.
Wireless sensor - tinyBrd Arduino IDE compatible
SKU:
tinyBrd-nrf
Weight:

9
g
Supplier:
ATtiny84 that can be programmed with Arduino IDE, add wireless transmission, less than 5 µA during sleep - you can build wireless mesh of ie.temperature sensors with central unit that will collect all values.
Product is retired
Replaced by: tinyBrd 2.0 - wireless sensor - Arduino IDE compatible
Product has replacement:
tinyBrd 2.0 - wireless sensor - Arduino IDE compatible
We introduce you a tinyBrd - small ATtiny board that we developed for our private use, but it’s so good that we decided to show it to you.
tinyBrd - what is it?
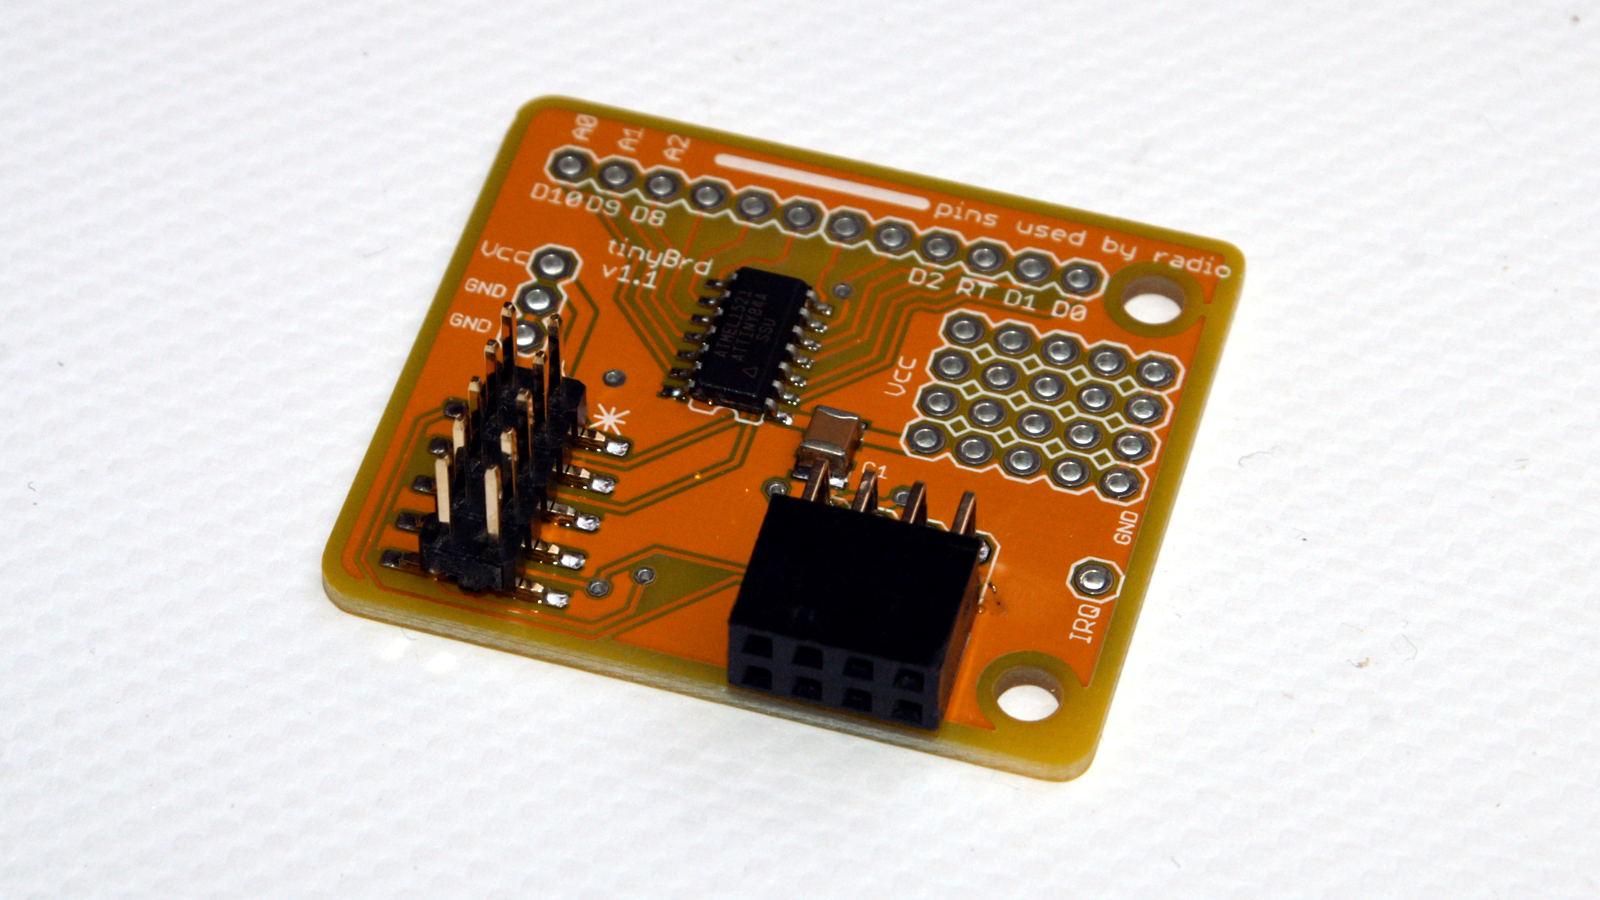
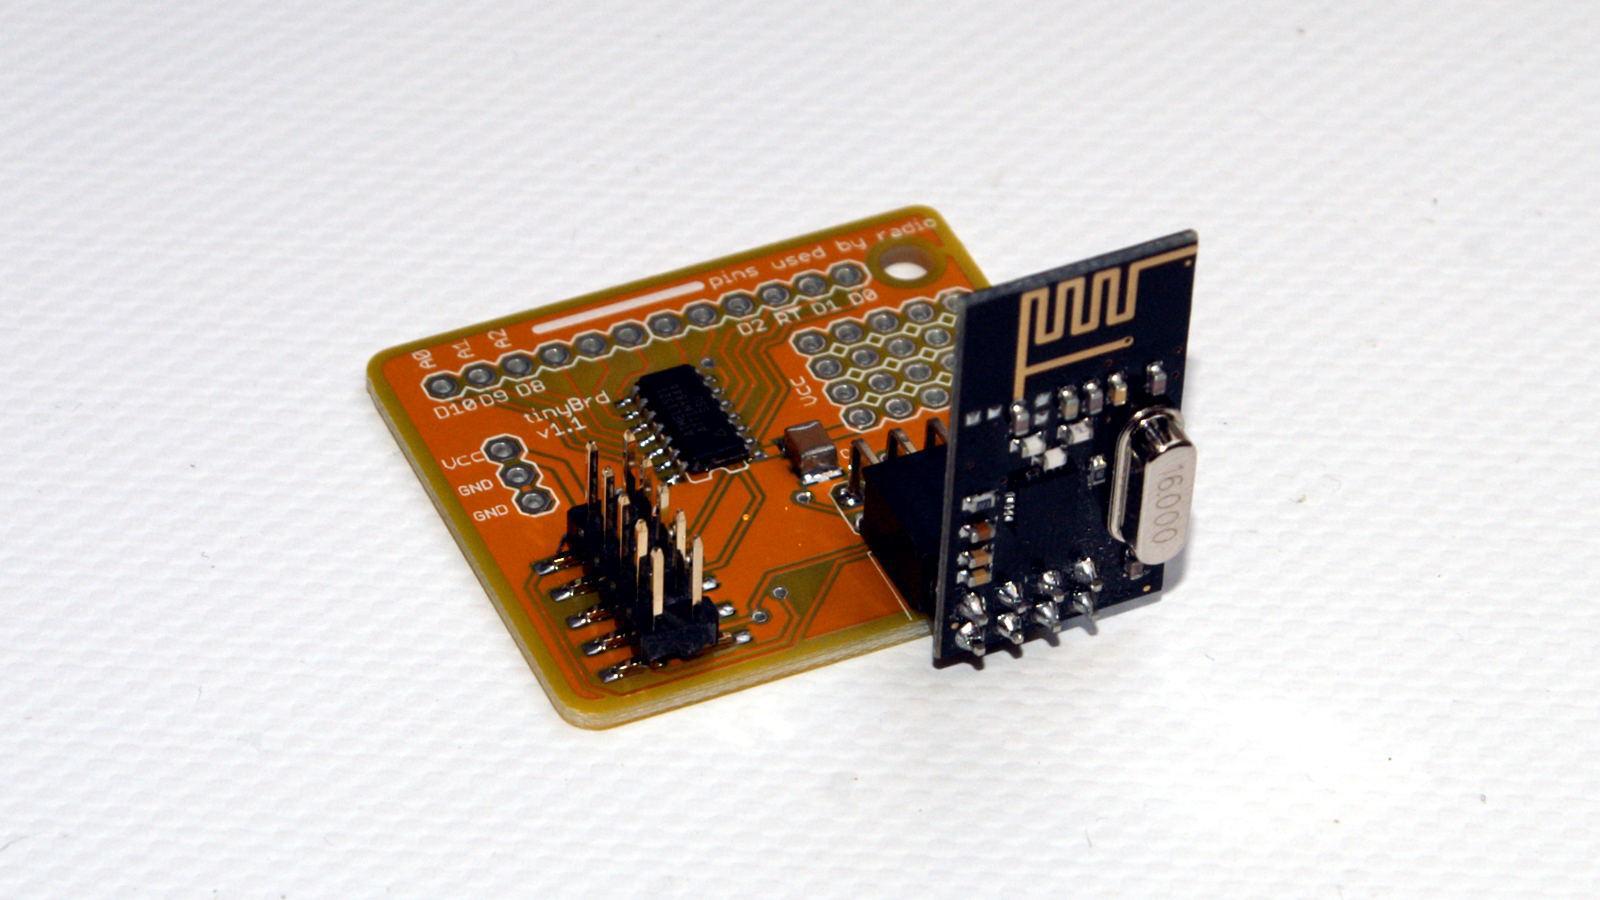
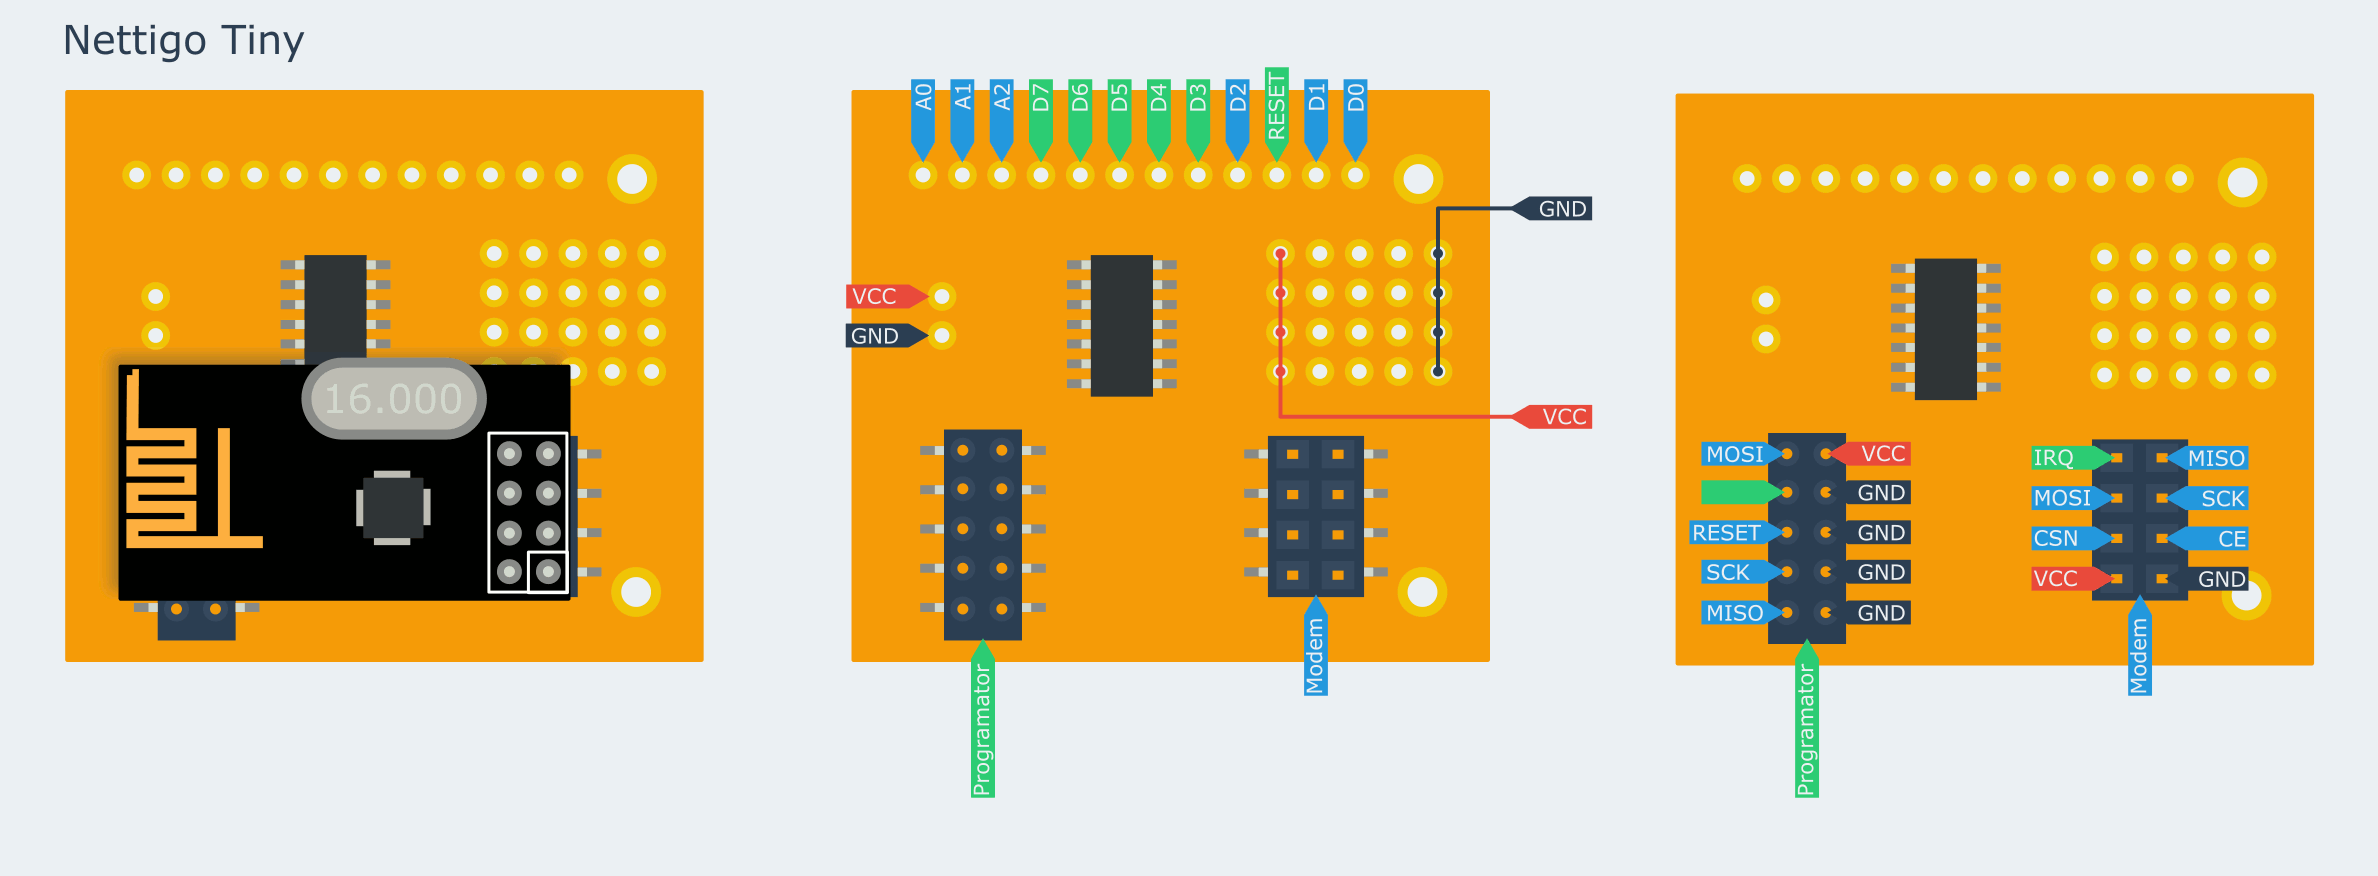
tinyBrd is a development board for testing and building wireless sensors. It’s very small, it has ATtiny84, connector for nrf24L01+ radio and small prototype area.
What about software?
We’ve prepared for you a package with everything that you need to program this board through Arduino IDE (boards module and libraries).
Wireless communication You only need to write the address of the main unit (receiver), then you define data structure and everything is ready to be send.
Sleep mode By calling one function you’re sleeping down the ATtiny and nrf24L01+ for previously defined time. During sleep mode tinyBrd is consuming lest than 5 µA ! During transmission power consumption increases up to 15 mA.
Battery monitor Because we’ll be mostly using tinyBrd as a standalone sensor, we decided to add function that checks battery level and send a report to main unit.
NRF24L01 PA+LNA
This board works also with NRF24L01+ PA+LNA, offers better range, however current consumption will be higher.
What else you’ll need?
For programming we suggest USBasp or Arduino UNO as a programmer. Remeber not use Vcc switch on USBasp when programming tinyBrd with NRF24L01 in socket. Providing 5V from USBAsp to NRF will damage modem.
For powering tinyBrd we suggest using 2 AA rechargeable batteries (it’ll give You 2V-2.8V). We can recommend battery box with switch for that. Remember - using supply voltage more than 3.6V will damage Your NRF24L01 modem.
You’re buying complete tinyBrd with NRF24L01+. To finish your network you’ll need one more NR24L01+ that will receive info and display it with ie. Raspberry Pi or Arduino UNO.
Documentation
You can find tutorials on how to use Nettigo tinyBrd at our site. At this moment tutorials are only in Polish language.
Documentation in English is work in progress, go to our post on StarterKit to read more
Specification
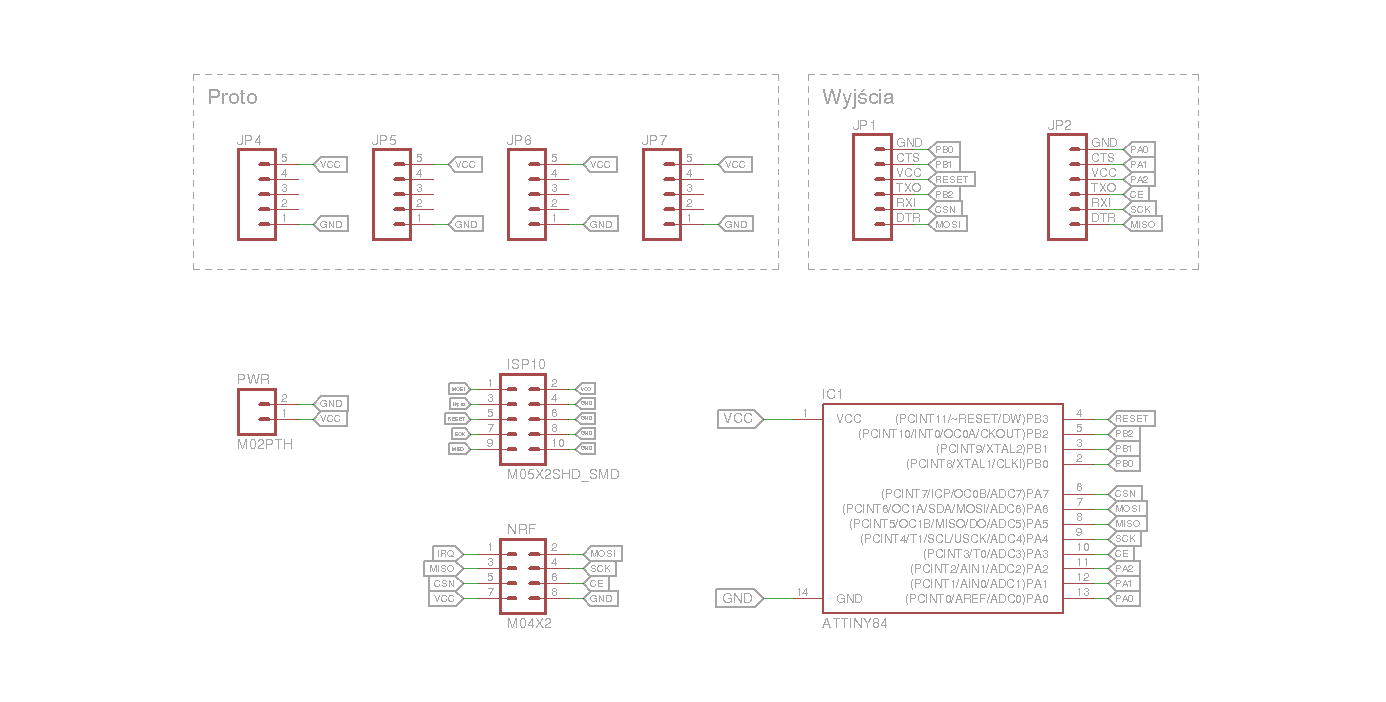
- ATtiny84 MCU, internal oscillator 8 MHz or 1 MHz
- NRF24L01+ connector
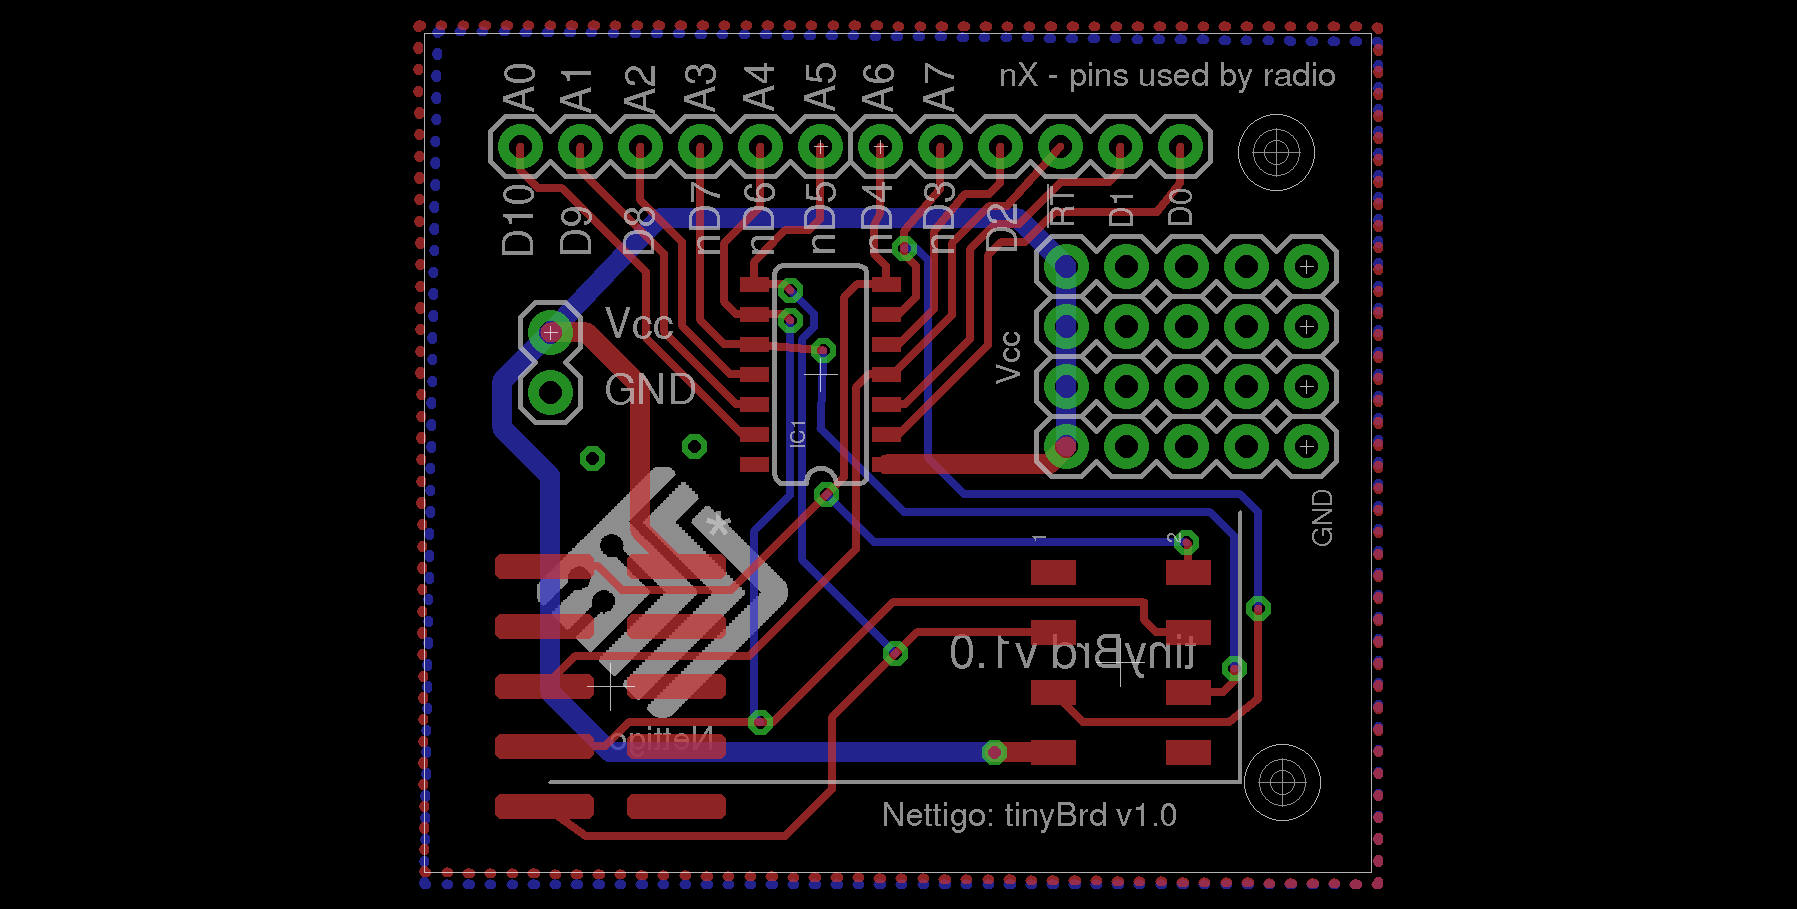
- size 40 mm x 35.5 mm, height with NRF module 32 mm (versions 1.0 and before: 16 mm)
- when NRF is connected ports D3, D4, D5, D6 and D7 are used to communicate with NRF

On board are brought all ATtiny IO ports, however D3,D4,D5,D6 and D7 are used by NRF. You can not use it as generic IO when NRF is in use.
Version history
- v0.2 - first public release
- v1.0 from Jul 2015
- fixed silkscreen
- IRQ signal from NRF brought out on PCB
- better position for power pins
- v1.1 from Oct 2015
- NRF24L01 now in vertical position (better range and reliability)
- 1 µF capacitor on Vcc line of ATtiny
- rounded PCB
- v1.2 - from 4.02.2016
- NRF connector changed from THT to SMD one
Eagle design files
Eagle design files - version 1.0
C++ and Python API for tinyBrd (in Polish)
Design files for tinyBrd
Recently added
More...Categories
Suppliers
Newsletter
Once, twice in month we will send You info about new products, products on sale and news from Arduino and DIY world.